- Log in to your WordPress admin panel.
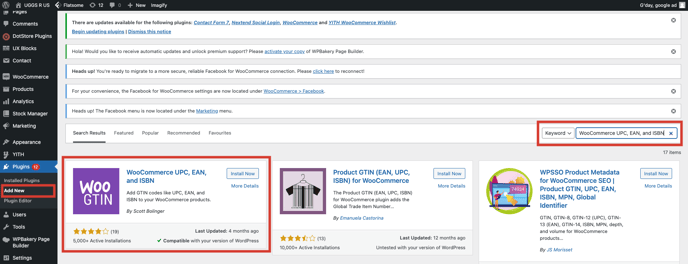
- In the left-hand menu, go to Plugins > Add New and install the "WooCommerce UPC, EAN, and ISBN" plugin, available for free here.
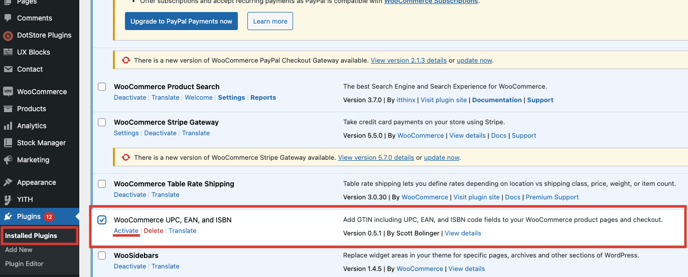
- In the left-hand menu, go to Plugins > Installed Plugins and Activate the WooCommerce UPC, EAN, and ISBN plugin.
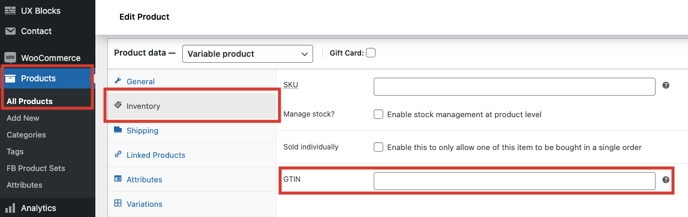
- After the plugin is Activated, in the left-hand menu, go to Products > All Products and select the product for which you want to add the GTIN. Select Inventory option, where you will see GTIN Text Field. Enter the product GTIN and then Update the product.
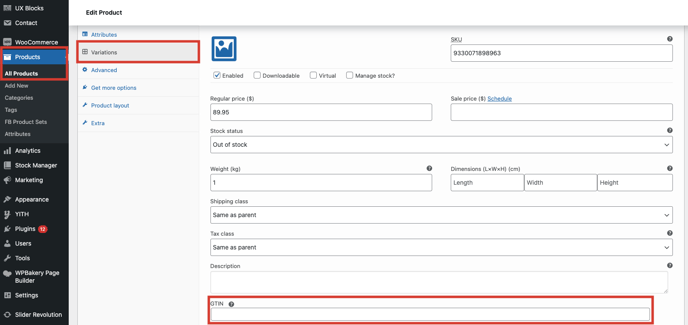
- If you have Product - Variants then select the Variations option and click the Variant you want to add the GTIN to. You will see the GTIN Text Field. Enter the variant GTIN and then Update the product.
Follow the above steps for all of your Products & Variants for which you have GTINs. You also have the option to Hide/Show the GTINs to your Product/Variant pages.
In the left-hand menu, go to WooCommerce > Settings > Products > Inventory and then scroll to the GTIN Settings section.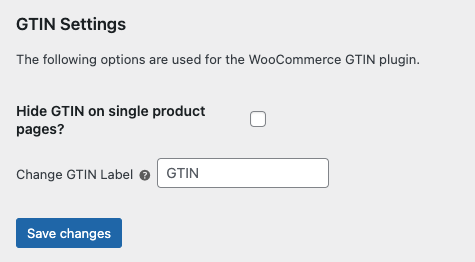
To implement Conversion Tracking & Dynamic Remarketing, check our Conversion Tracking and Dynamic Remarketing Tag instructions for WooCommerce guide.