If you don't know where the setting is to Verify & Claim your website in Google Merchant Center, check our Where to find the setting to Verify & Claim your website in Google Merchant Center account guide.
The best way to verify & claim your website in Google Merchant Center is to add an HTML tag to your website.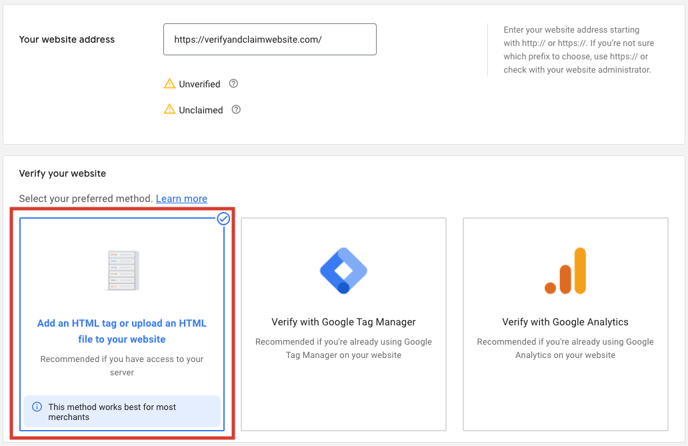
After selecting the Add HTML tag or upload an HTML file to your website option, you will see steps to add the HTML tag. Copy the HTML tag.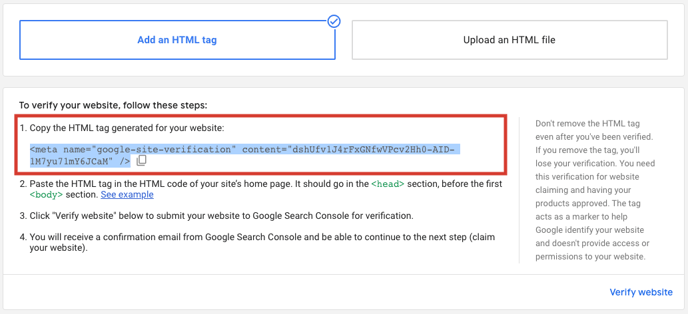
The following steps will help you add the copied HTML tag to your Neto store.
- Log into your Neto admin portal.
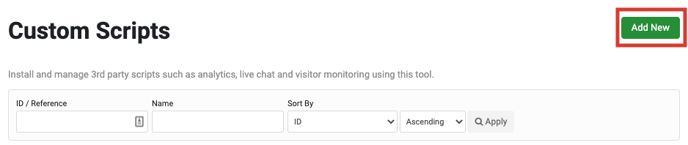
- In the left-hand menu, go to Settings & Tools > All Settings & Tools and select Analytics & 3rd Party Scripts > Custom Scripts.
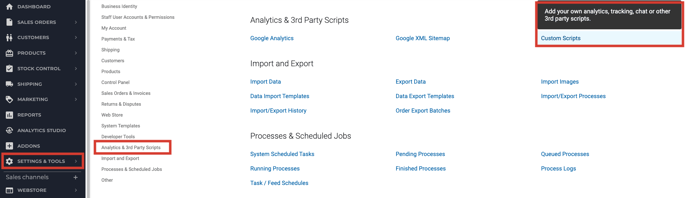
- In the top-right hand side, click Add New.
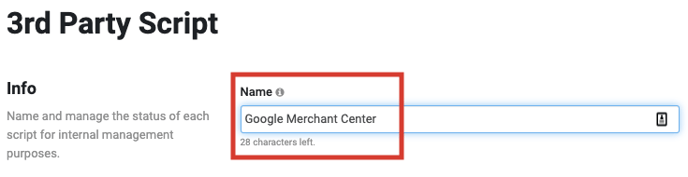
- Name the script Google Merchant Center.
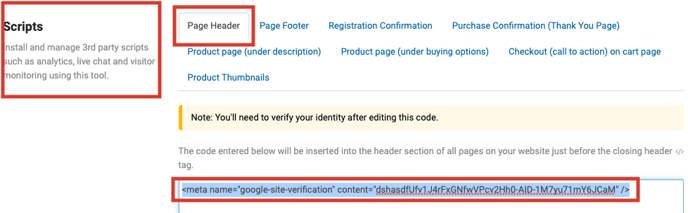
- Scroll to the Scripts section. In the Page Header section, paste the copied HTML tag and click Save.
Now, all that is left is to Verify & Claim your website in Google Merchant Center. Go back to Google Merchant Center and click Verify website.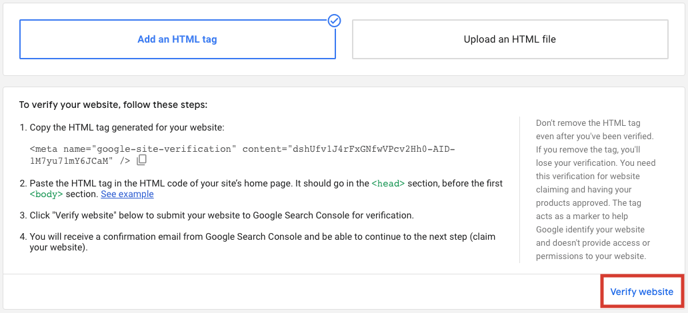
Once verified, you will need to CLAIM URL.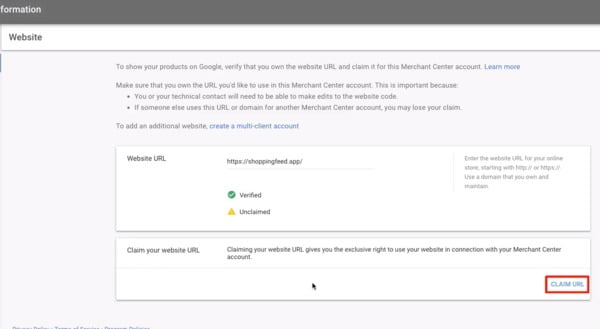
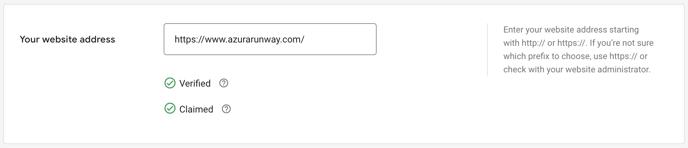
You have now successfully verified & claimed your website in Google Merchant Center.